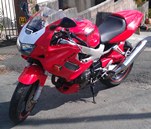
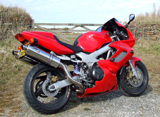
just bought some goodies from wemoto to service my brakes
took them off with ease
took them to work to us the companies parts washer and to service them in work's time
ie getting paid to work on my bike
then the problems started as i couldn't undo the grub screws that hold the pad retaining pins in after much swearing and almost rounding the dam things of they gave up with a little heat around the casing
used the old trick of compressed air to get the pistons to pop out, all except 2 that just didn't want to move but with a little more swearing the fat bold bloke won in the end
fat bold bloke 1 stuck piston 0
once apart it became clear why the bike wasn't stopping very well
with more compressed air and time all the piston's were out ready for a good clean up with some 1200 wet and dry which brought them up really well
once my wemoto package turn up it was just a case of reassembly of all the now cleaned parts and new parts and i must say i'm quite impressed with the out come
i don't think the brakes had been off and cleaned properly for years i was going to re paint them red but could'nt be arsed in the end as moneys tight and i have alot of other things to do to the bike like tyres chain fork seals just to get it back on the road
the wemoto parts seam fine the brakes are working well so all in all i'd say they are ok very quick service from them
This might be useful for others thinking about doing this job.
I found the best way to get the pistons out (especially if you do not have access to compressed air) is to remove the pads first, then unbolt the caliper from the fork leg and pump the pistons out until they touch each other from the opposing side, try to get them to touch in the center of the caliper so each piston is sticking out the same amount. Watch the fluid as you do this as you may need to top it up if you don't want air in the brake master cylinder.
Once you then split the calipers you can remove the pistons with a little wiggle by hand. Each piston should go back in the same place as it came out.
Also try undoing the grub screws before removing the calipers from the bike and the retaining pin while you're there as well. I found a big Stanley screwdriver works the best for undoing stubborn grub screws as mine fits the full width of the grub screw head. I think using a screwdriver which is narrower than the grub screw head is where the problems begin, that and with them being tightened up to tight in the first place. The grub screws only need to be nipped up.
it took a fair bit of time and fiddling about, but you can achieve a good finish by painting the calipers, heres my attempt, not bad for a first try.......
cheers blue
if you go to the pimp section and click on bsm project update, on page 5 you will see some more pics of the different stages.
i removed all the bolts and bleed nipples, and the little seals, then split the calipers in two, as i said before the job is a bit fiddly. i spent a fair bit of time clean and sanding/rubbing down the calipers (i also used a hand held rotory tool to get into some of the awkward areas, although i was just being ott), they are from a 98 blade rrw
you must also take your time masking up the inside of each half of caliper. because i didn't want to get paint in the bolt holes i put masking tape around the top half of the bolts and then screwed them half way in, this is useful because you can use the bolts to hold onto the caliper and move it around to get to the different angles.
so once its clean/sanded and masked, i gave it a quick once over with a cloth and a bit of white spirit as to take off any greasy finger prints and dirt.
you don't need to coat with primer, just straight on with a hi temp brake caliper spray paint, you can use a paint and brush if you like, but i doubt the finish will be as good, in total i put 3 coats of paint on, take your time and let each coat go tacky before applying the following coat, i made a rock up and had one or two drips in the paint, just becareful on how thick you apply the paint and as to the angle the caliper is resting at as it drys, even if you do get a drip in the paint it ain't the end of the world, let it dry and use some wet n dry to rub it down(you only need to rub down the area with the drip not the whole caliper), another quick wipe over with the thinners and paint again.
the paint took along time to harden, but once it did i masked up around the nissin lettering and got a small block of wood and wrapped some fine sandpaper around it, then you can carefully rub the paint off the nissin lettering in the middle of the caliper. becarefull not to take any paint off the main part of the caliper, then take off the masking tape around the lettering. another quick wipe with white spirit and it was time to use some clear laquer, again a couple of coats is fine, i used a halfords clear laquer.
thats pretty much it, mine aren't perfect but i'm more than happy with them. i've still got to get hold of a spare firestorm rear caliper and give it the same treatment
i also bought some lurvely titanium bolts and cleaned up the original bolts with some sandpaper, i then put a bit of copper grease on the bolts just for good meassure.
i haven't put them on the bike yet, but i'll post some pictures when i do......
i hope this helps buddy