For a man with your skills fork seals will be a walk in the park. Even I can do it.......
Just YouTube it. I made sliders out of old pipe with clamps. It can take some number of blows to separate and I was always a bit worried but it really is easy.
Various ways of ensuring the correct amount of oil goes in using air gaps etc, but I ended up weighing the oil, I measured what the old oil was as a Base line also. Jugs were only 75p from £shop. Remember to leave oil bottles in a undisturbed place for 24hrs for the bubbles to settle before using.
And so it begins !!!!
-
grumpyfrog
- Posts: 1549
- Joined: Thu Apr 14, 2011 1:22 pm
- Location: Tayside
Re: And so it begins !!!!
Don't hassle me
I'll get there at some time
I'll get there at some time
Re: And so it begins !!!!
It lives, it lives, it lives !!!!!!
Managed to get some quality time in the garage today, so first job was to rebuild the front calipers with the seal kit from powerhouse.
Then it was clean up the fork lowers with the rotary brass wire brush etc, before masking them off and then giving them a few coats of etch.
Then, i fitted the link pipes and those naughty exhausts and of course i couldnt put it off any longer, so refitted the tank and put in a gallon of finest unleaded.
Then it was choke on, press the button!!!!!
Turned and turned and turned.....
Then there was a hint of a fire, then a backfire, then she was off!!!!!!!!
And you know what she doesnt sound half bad!!!!!
Sorted fast tickover then let her getup to temperature, with no undue sounds and just a slight oil leak from where one of the oil cooler pipes goes into the block. Nipped that up a touch, but will put a new o ring in if it persists.
Just letting it cool down now before checking coolant.
Its been a very long road, with major surgery on that front head, but its looking good......
What a learning curve though!!!!!
Brian

Re: And so it begins !!!!
Woop de woop woop... 
Making up since 2007, sometimes it's true...Honest...

Re: And so it begins !!!!
Congratulations mate
Carpe diem, quam minimum credula postero
F3, 954 USD front, K Tech springs, Braced swinger, Penske shock, Six spoke Mockesini wheels, Harris rearsets, QaT, Flywheel diet!, A&L stacks, stick coils, K&N, FP Ti jets, lashings of Ti & CF
F3, 954 USD front, K Tech springs, Braced swinger, Penske shock, Six spoke Mockesini wheels, Harris rearsets, QaT, Flywheel diet!, A&L stacks, stick coils, K&N, FP Ti jets, lashings of Ti & CF
-
agentpineapple
- Posts: 15124
- Joined: Sat Mar 26, 2011 9:16 pm

Re: And so it begins !!!!
Good work Brain, well done, you should be very proud of yourself 
Chris.
Chris.
Re: And so it begins !!!!
Thanks fellas
This has been a long road, but im nearly there to having a very usable bike.
Just get that front end painted up, calipers refitted and bled. Then its on with the bodywork.
I suspect the switch gear will need taking apart as it feels a bit stiff.
Ill give it another start and let it get to temp again, just to make sure thngs are ok.
Re: And so it begins !!!!
If you mean light corrosion 1 to 2mm from the brake pad end of the pistons they should be okay, as that is not near the main seals. My pistons had a little bit of corrosion on a few of them too, I gave them a rub down with some fine wet and dry used with a little brake fluid rather than water, just make sure to give the pistons a good clean with brake cleaner once the worst is removed with a clean cloth, after you've finished with the wet and dry. You just want to remove the corrosion to make the piston surface smooth so that it doesn't damage the dust seal if it should come into contact with the corroded area, nothing raised above the pistons original surface. Don't try to remove the pitting completely as it'll most likely leave a flat spot if it's deep,BrianC wrote: I took the front calipers off as they are really grotty and have split them as the pistons seems very stiff - the pistons just have light corrosion about 1 to 2 mm from the top. Are they reusable or should i go for replacements???? Im going for new seals anyway.
How do other people clean up grotty calipers?
Brian
Chris.
Re: And so it begins !!!!
Happy days Brian im sure your well chuffed
the older i get,the faster i was 
Re: And so it begins !!!!
After the trials of my faulty petrol tap - see other thread!!!!
I continued work on the fork lowers
Very Very crusty!!!
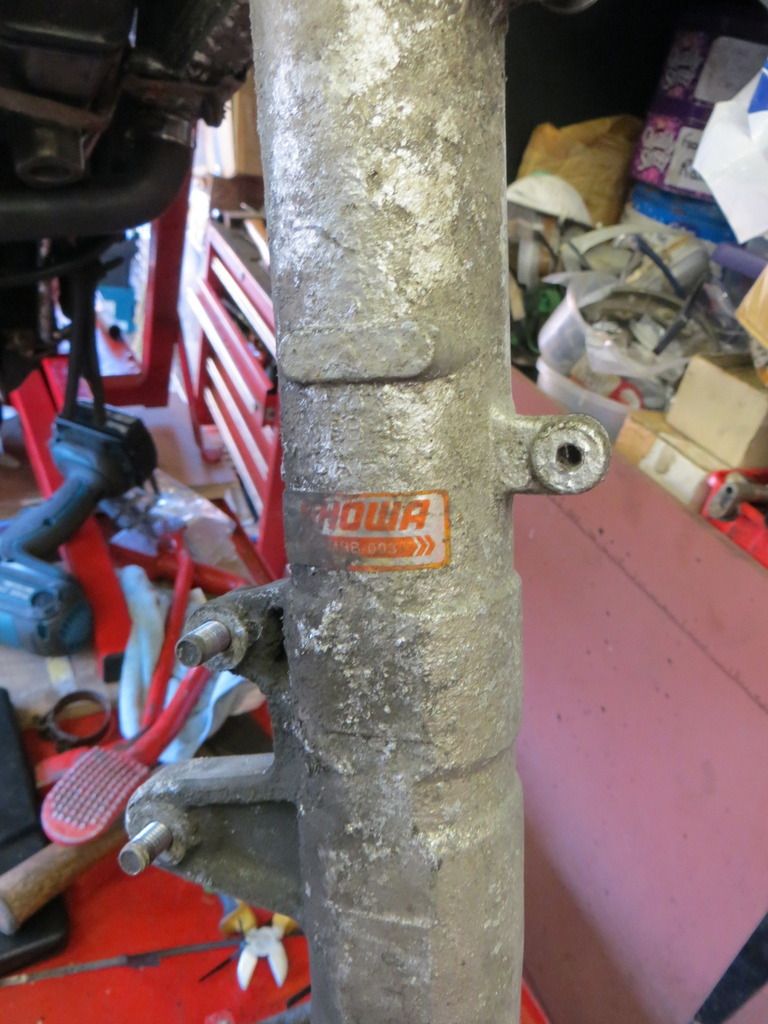
First job was to clean them up with a rotary brass wire brush, then do all teh detail cleaning with a abrasive pad, until they look something like this
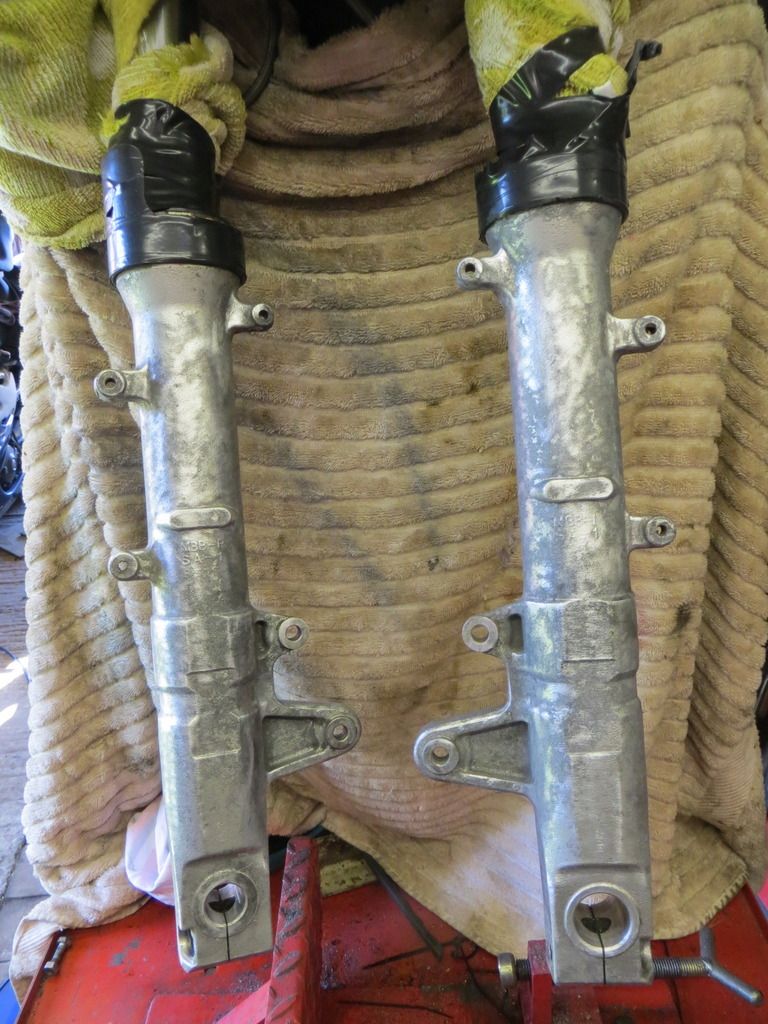
Then after masking everything off to avoid any over spray its a few coats of etch primer
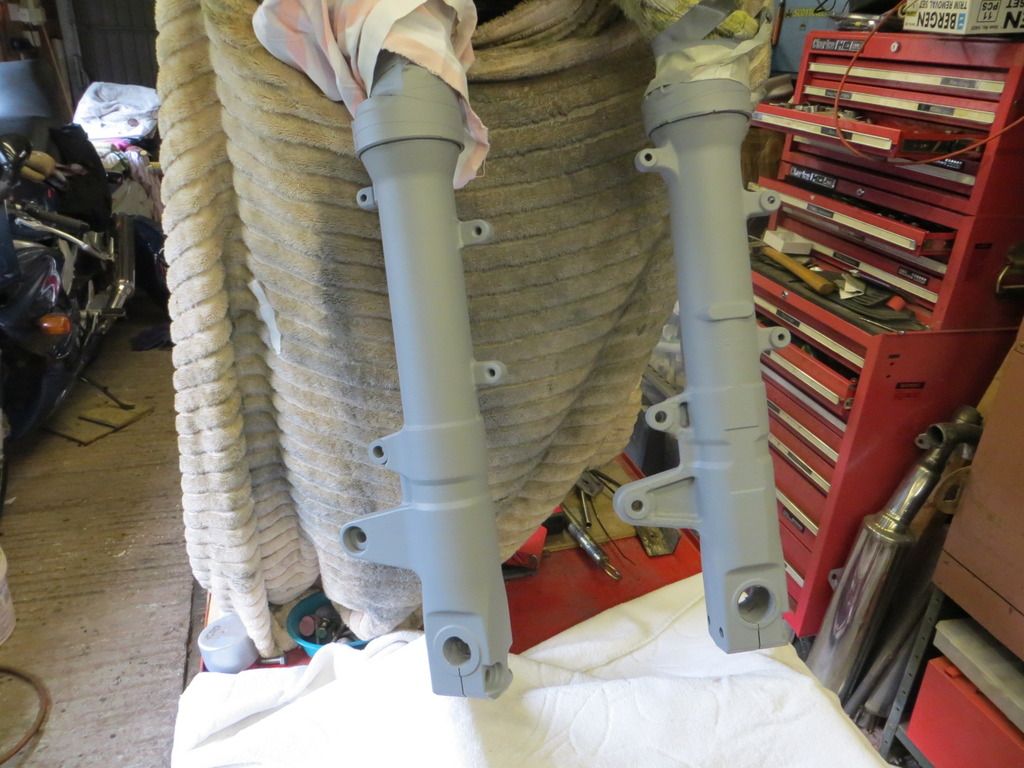
Starting to look much better now !!!!
Then its a few coats today of steel wheel paint and they are looking like new !!!!!!!

Tomorrow once the silver has hardened 'll get a few coats of laquer on them.
Just need to sort that tap now !!!!
-
bigtwinthing

- Posts: 5577
- Joined: Mon Dec 17, 2012 7:52 pm
- Location: Hampshire
Re: And so it begins !!!!
i,ll be forked they look great.
missing the noise, not the vibes. However never say never!
Re: And so it begins !!!!
Nice job there Brian ... Think we are all looking forward to seeing the finished article ,
chrisc
chrisc
Re: And so it begins !!!!
Wow those fork legs came up a lot better than I was expecting after seeing the first crusty photo
Well done Brian, nice job
Chris.
Well done Brian, nice job
Chris.
Re: And so it begins !!!!
So today i fitted the replacement petrol tap, then refitted the tank and off she went again!!!!! Sounds great with the naughty cans. Slightly rattly on startup but as soon as it warms up sounds fine shich is consistent with the manual ccts. Very slight surge up and down on tick over but nothing to worry about at this stage.
Also applied lots of coats of laquer to fork bottoms , which look great!!!!
Tomorrow its back on with the front wheel and the refurbished calipers, new seals and all..... then bleed the brakes.
Then start to get all the bodywork back on.
Its coming on well.
Also applied lots of coats of laquer to fork bottoms , which look great!!!!
Tomorrow its back on with the front wheel and the refurbished calipers, new seals and all..... then bleed the brakes.
Then start to get all the bodywork back on.
Its coming on well.
Re: And so it begins !!!!
Good work Brian, well done
Chris.
Chris.