
Regarding the shock with the after market spring. I can't say 100%, but it looks very much like a Maxton spring to me, as that black collar is what they normally use (I fitted one on my Storm many years ago and are an improvement over the original, but it needs to be the correct one for you own body weight). The collar is used as the diameter required is less than at the top end of the shock. If you study the Honda standard spring you can see the spring has a reduced diameter at the preload adjuster. You probably won't be removing the spring, but if you do and it definitely is a Maxton, there will be the spring weight number engraved on it at one end,
Chris.
And so it begins !!!!
Re: And so it begins !!!!
Thanks chris.
The cartridge on the one with the purple spring definitely has a showa label on it and that Showa code ie mbb-731.
Not sure if there is a source to f d out which Showa shocks are fitted to which bikes.
The cartridge on the one with the purple spring definitely has a showa label on it and that Showa code ie mbb-731.
Not sure if there is a source to f d out which Showa shocks are fitted to which bikes.
Re: And so it begins !!!!
Ah
I see what ou mean. - the spring may be maxton
Excuse my ignorance !!!!
Brian
I see what ou mean. - the spring may be maxton
Excuse my ignorance !!!!
Brian
-
agentpineapple
- Posts: 15124
- Joined: Sat Mar 26, 2011 9:16 pm
Re: And so it begins !!!!
deffo a standard shock, but as has been mentioned, it looks like a Maxton or maybe hyperpro spring.
HEY YOU GUYS!!!!!!
Re: And so it begins !!!!
You got itBrianC wrote:Ah
I see what ou mean. - the spring may be maxton
Excuse my ignorance !!!!
Brian
No worries Brian,
Chris.
Re: And so it begins !!!!
Good luck with the second storm hope you don't need to much to repairit
Re: And so it begins !!!!
Cheers geeman
I think i have most of what the need now.
Given it only cost me£600 to buy its ecconomical to do the work.
To be honest i will probably export one of my two storms to Malta to use when i am over there. My friend will keep it in his garage.
Brian
I think i have most of what the need now.
Given it only cost me£600 to buy its ecconomical to do the work.
To be honest i will probably export one of my two storms to Malta to use when i am over there. My friend will keep it in his garage.
Brian
Re: And so it begins !!!!
So the used suspension from flea bay 'dog bone' arrived today and its perfect !!!!!
Great bearings and seals and perfect collars.
So it will be full speed ahead tomorrow and get the rear end built up, brgore moving onto the front cylinder head problem.
But progress is always a fuel towards completion!!!!
Brian
Great bearings and seals and perfect collars.
So it will be full speed ahead tomorrow and get the rear end built up, brgore moving onto the front cylinder head problem.
But progress is always a fuel towards completion!!!!
Brian
Re: And so it begins !!!!
I'm glad the dog bones not been chewed up, keep it up Brian you're doing a good job there . 
chrisc
chrisc
Re: And so it begins !!!!
Progress report for today - Friday!!!
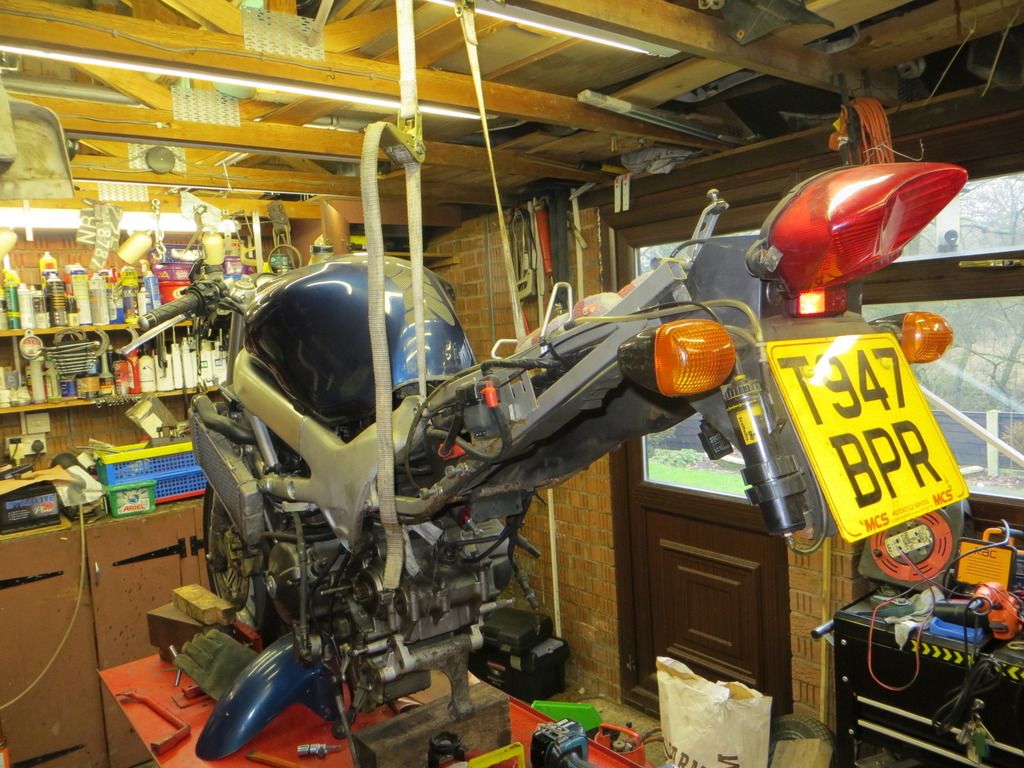
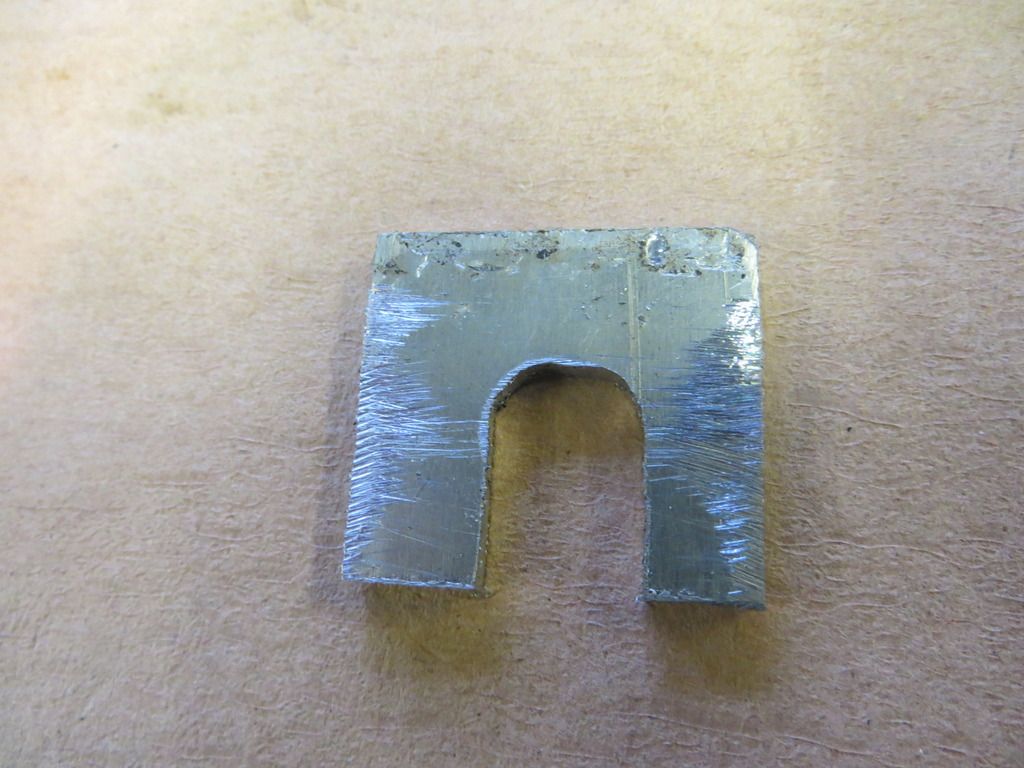
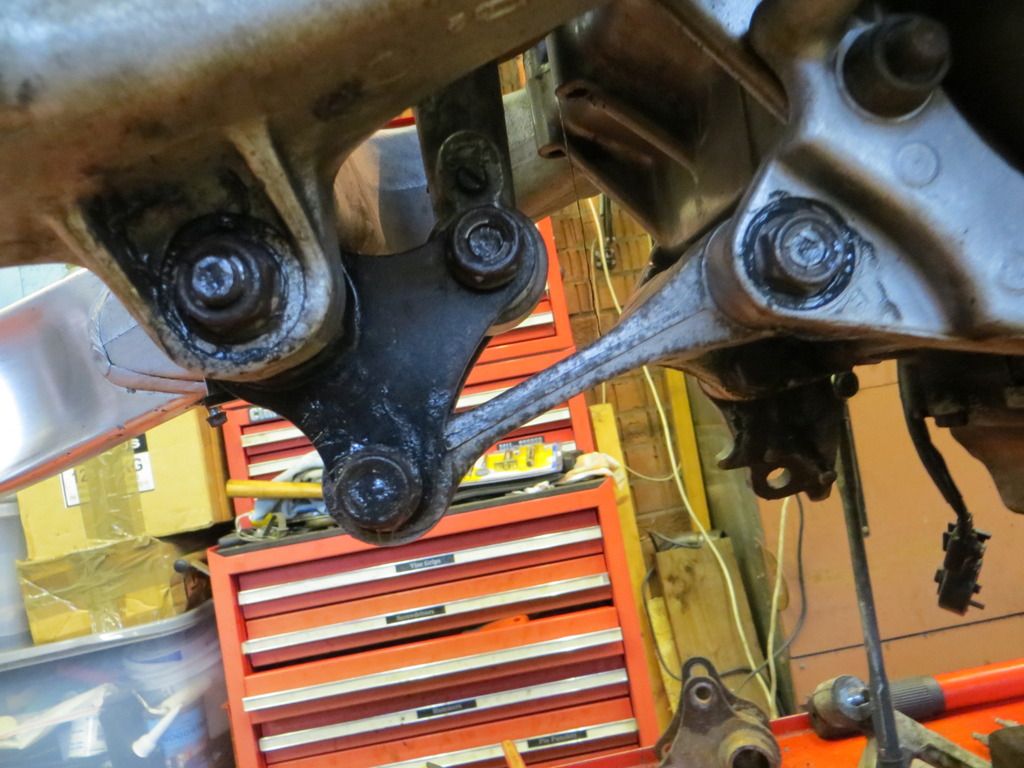
The replacement suspension dog bone turned up yesterday so it was full speed ahead with rebuilding the rear suspension. First thing was to remove the collars from the replacement dog bone and thoroughly grease the bearings, which were pretty well greased anyway. Then it was make a 4mm spacer washer to fit under the top mounting of the shock.
And talking of the shock I’m using the replacement one with the purple shock as the original one is completely shot,
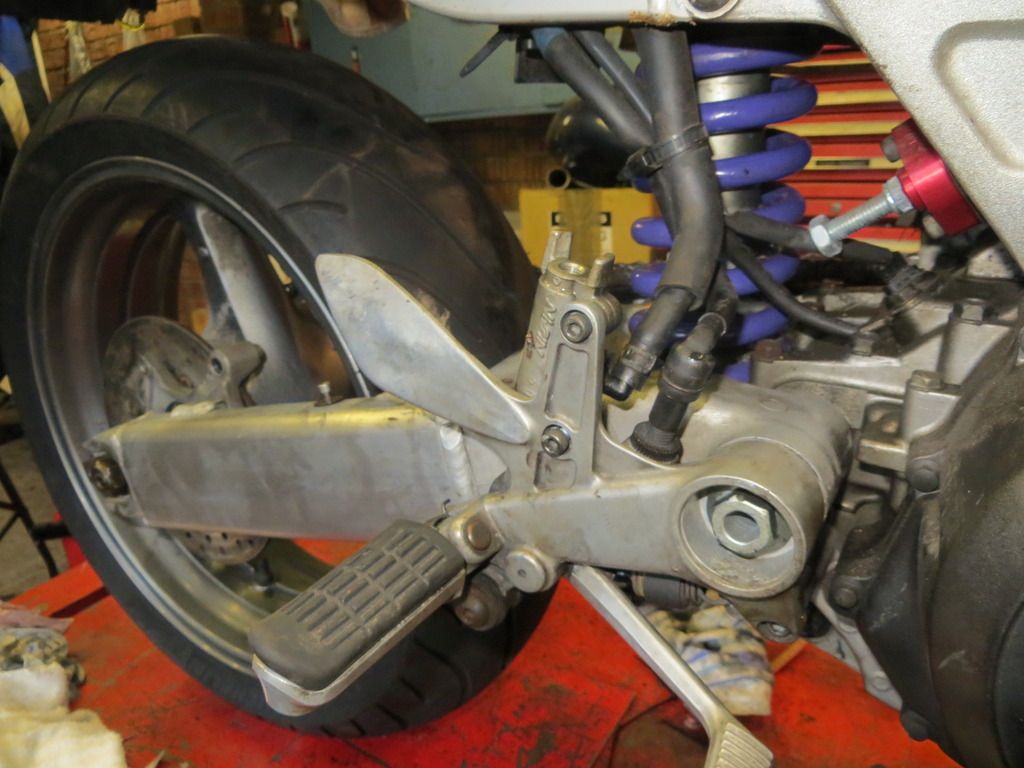
So, with the shock in place it was the joining of the swing arm, the triangular pivot, the dog bone and the shock. And there we have it – all back in place. I had also fitted the offside foot peg, brake pedal and rear brake master cylinder.
I can’t fit the nearside foot peg as I’m still waiting a couple of gaskets from Silvers for the clutch cylinder and the cover, so that side of the job is stalled.
While the rear wheel was off I had removed the sprocket and disk and generally gave everything a good clean and check. All the bearings and seals on the wheel and sprocket carrier are fine.
What I omitted to say previously is that although the chain and sprockets had been replaced before I bought the bike, with standing the chain had become very stiff, so I spent quite some time freeing off every link and giving it a good clean up, until it was fine. So with the wheel in place I refitted the front sprocket and chain to the rear sprocket and all is well there now. Bike has ceased to be suspended from the garage rafters and the paddock stand is back in use.
So stalled at the rear end, it was time to commence the real big job, which is to address the presumed cct failure on the front cylinder.
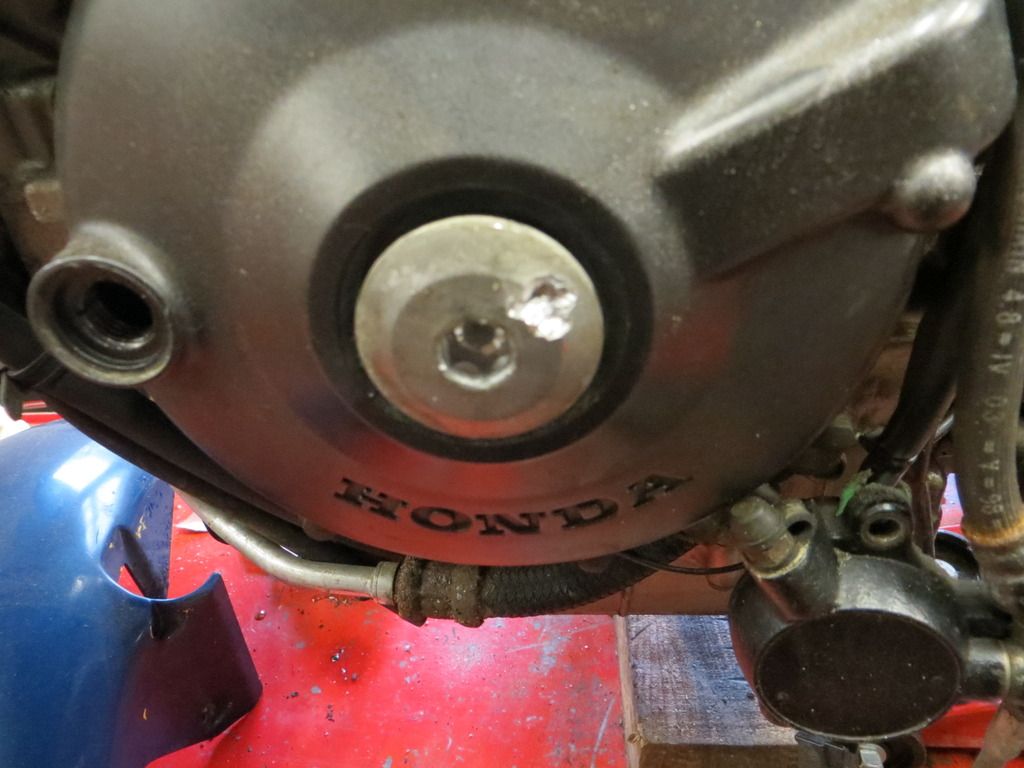
First thing to try was to remove that damned inspection plug in the generator cover – the one that is made of chocolate – and true to form even with the impact drill it just rounded off, so it was the brutal chisel approach which made light work of removing it, but destroying it in the process – another call to Silver !!!! As per usual the smaller plug came out no problem.
I’d already dropped the coolant so then dropped the oil
To make things easier I have removed both radiators and hoses and also removed the oil cooler rad as well – unfortunately I couldn’t get the oil cooler off without removing the lead to the starter, which I had already identified as corroded!!! When I tried to remove the securing nut it was in danger of all revolving, so with the help of the grinder to reduce the thickness of a spanner to hold the lock nut the securing nut was freed and the cable removed, and then the oil cooler was put to one side.
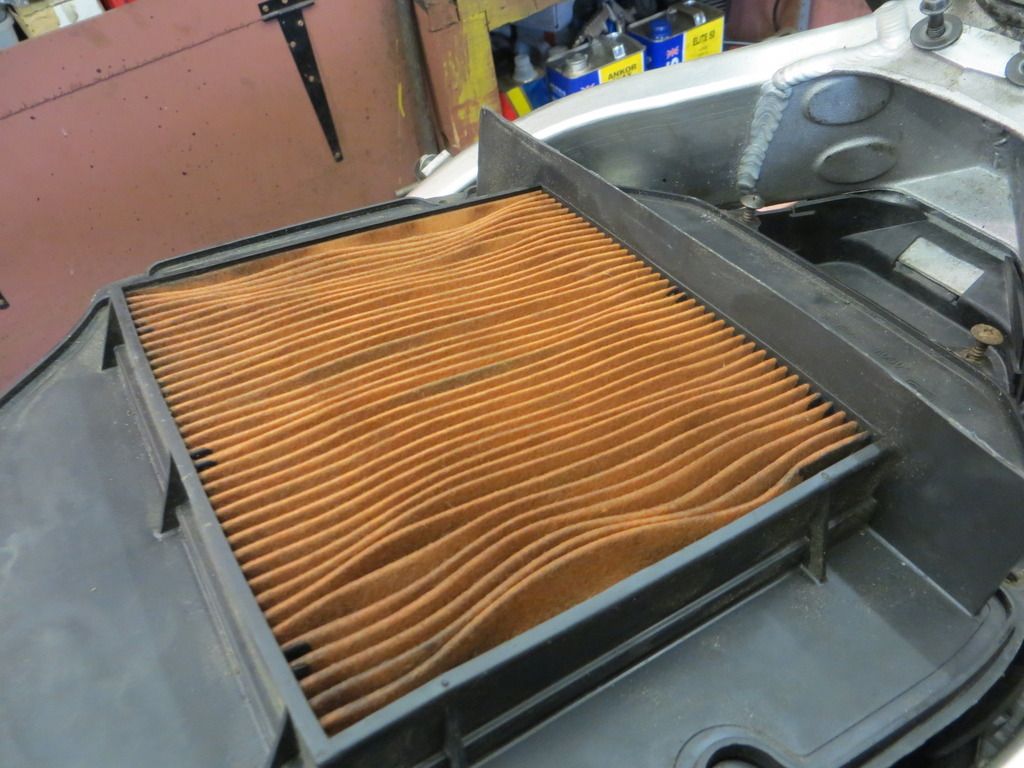
So without wishing to re-write the excellent ‘How to’ guide I had the usual struggles removing the tank and then the air box, which although had a Pipercross sticker on the lid, contained a very dirty standard Honda airfilter.

So, with the box off the carbs were removed with all the pipes/cables etc,
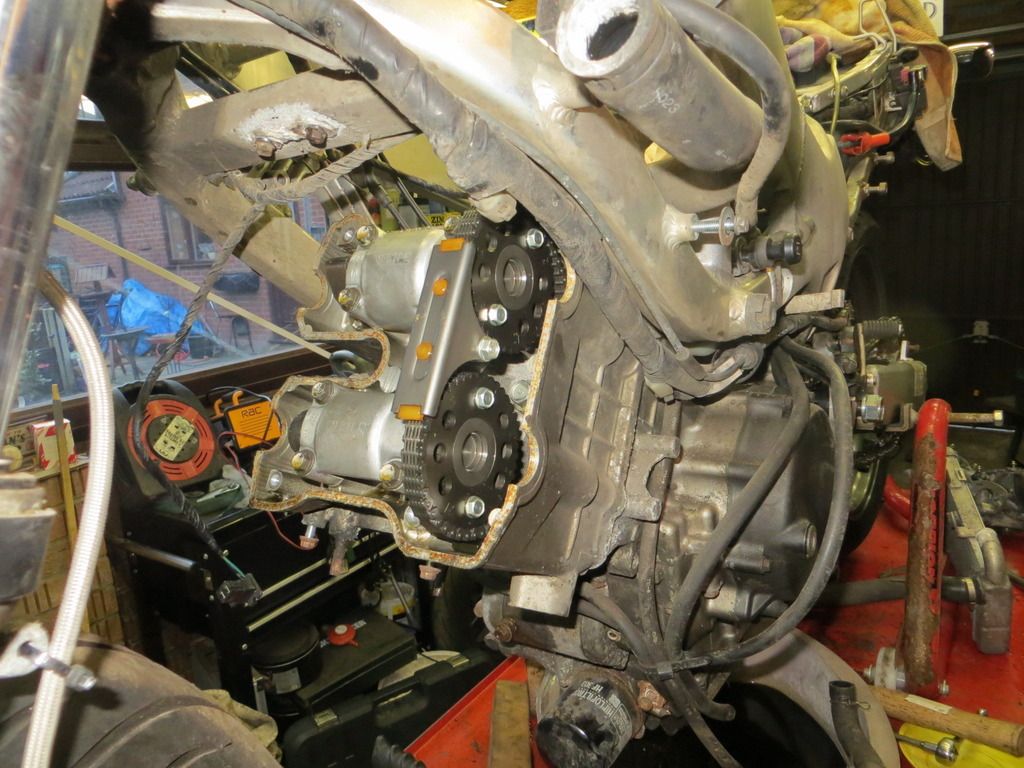
And last of all I’ve removed the cam covers. Rotating the crank, the relative position of the rear cams look pretty good, but it is clear something is amiss at the front as the relative cam positions seem wrong,
Time had defeated me by this stage, and it was probably wise to leave off until a fresh day to work out what is going on.
It looks to me like the previous owner had a cct failure, and just fitted manual CCTs – without aligning everything, which is bonkers!!! I suspect this is so because the cam cover bolts were incredibly tight and seemed like they had never ever been off.
So roll on the next session, but for now I’ll refresh my thoughts with the excellent CCT replacement guide, before progressing. I fully expect to have to remove that front head to be honest as who knows what has happened inside.

The replacement suspension dog bone turned up yesterday so it was full speed ahead with rebuilding the rear suspension. First thing was to remove the collars from the replacement dog bone and thoroughly grease the bearings, which were pretty well greased anyway. Then it was make a 4mm spacer washer to fit under the top mounting of the shock.

And talking of the shock I’m using the replacement one with the purple shock as the original one is completely shot,
So, with the shock in place it was the joining of the swing arm, the triangular pivot, the dog bone and the shock. And there we have it – all back in place. I had also fitted the offside foot peg, brake pedal and rear brake master cylinder.


I can’t fit the nearside foot peg as I’m still waiting a couple of gaskets from Silvers for the clutch cylinder and the cover, so that side of the job is stalled.
While the rear wheel was off I had removed the sprocket and disk and generally gave everything a good clean and check. All the bearings and seals on the wheel and sprocket carrier are fine.
What I omitted to say previously is that although the chain and sprockets had been replaced before I bought the bike, with standing the chain had become very stiff, so I spent quite some time freeing off every link and giving it a good clean up, until it was fine. So with the wheel in place I refitted the front sprocket and chain to the rear sprocket and all is well there now. Bike has ceased to be suspended from the garage rafters and the paddock stand is back in use.
So stalled at the rear end, it was time to commence the real big job, which is to address the presumed cct failure on the front cylinder.
First thing to try was to remove that damned inspection plug in the generator cover – the one that is made of chocolate – and true to form even with the impact drill it just rounded off, so it was the brutal chisel approach which made light work of removing it, but destroying it in the process – another call to Silver !!!! As per usual the smaller plug came out no problem.

I’d already dropped the coolant so then dropped the oil
To make things easier I have removed both radiators and hoses and also removed the oil cooler rad as well – unfortunately I couldn’t get the oil cooler off without removing the lead to the starter, which I had already identified as corroded!!! When I tried to remove the securing nut it was in danger of all revolving, so with the help of the grinder to reduce the thickness of a spanner to hold the lock nut the securing nut was freed and the cable removed, and then the oil cooler was put to one side.
So without wishing to re-write the excellent ‘How to’ guide I had the usual struggles removing the tank and then the air box, which although had a Pipercross sticker on the lid, contained a very dirty standard Honda airfilter.


So, with the box off the carbs were removed with all the pipes/cables etc,
And last of all I’ve removed the cam covers. Rotating the crank, the relative position of the rear cams look pretty good, but it is clear something is amiss at the front as the relative cam positions seem wrong,
Time had defeated me by this stage, and it was probably wise to leave off until a fresh day to work out what is going on.
It looks to me like the previous owner had a cct failure, and just fitted manual CCTs – without aligning everything, which is bonkers!!! I suspect this is so because the cam cover bolts were incredibly tight and seemed like they had never ever been off.

So roll on the next session, but for now I’ll refresh my thoughts with the excellent CCT replacement guide, before progressing. I fully expect to have to remove that front head to be honest as who knows what has happened inside.
Re: And so it begins !!!!
You're making very good progress Brian
Chris.
Chris.
Re: And so it begins !!!!
Thanks Chris
Its a challenge but Im loving it !!!!
Makes a change to working on old Zundapp 2 stroke engines !!!
I cant wait to work out what is going on with that front head
Brian
Its a challenge but Im loving it !!!!
Makes a change to working on old Zundapp 2 stroke engines !!!
I cant wait to work out what is going on with that front head
Brian
Re: And so it begins !!!!
Spring looks like Hyperpro, softer and much better ride.
Re: And so it begins !!!!
Re the cam positions, sometimes, people take out the old cct and fit a manual without turning the engine to the correct place.
Most other bikes can get away with this.
I even know of a Honda main dealer who did this...
As soon as the tension is off the chain, the sprocket jumps a tooth or two under the chain. You can hear it click as it does it.
As long as the engine isn't started, you can save it.
But once you press the starter, even if it doesn't fire, if the movement is more than one tooth, the damage is done.
It's not falling off, it's an upgrade opportunity.
Re: And so it begins !!!!
Ok , here is Mondays update.
I managed to get a few hours in the garage today and decided it was full on for working out what is going on with that front cylinder.
Firstly however I checked the timing marks for the rear cylinder, as per the CCT guide and all is well, which is what I suspected.
Moving to the front cylinder it took me a while to work out properly how to be sure I was on TDC on the compression stroke - should have read the instructions as its very clear from them!!!!
Wherever I had the timing it was quite clear something was amiss - as suspected.
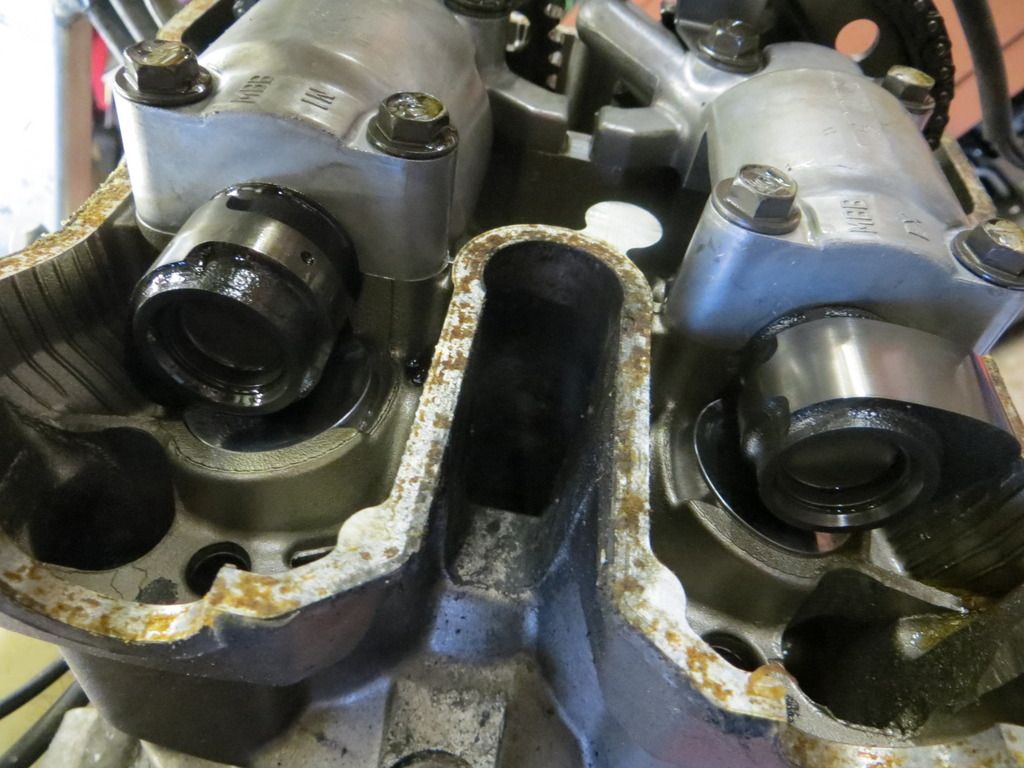
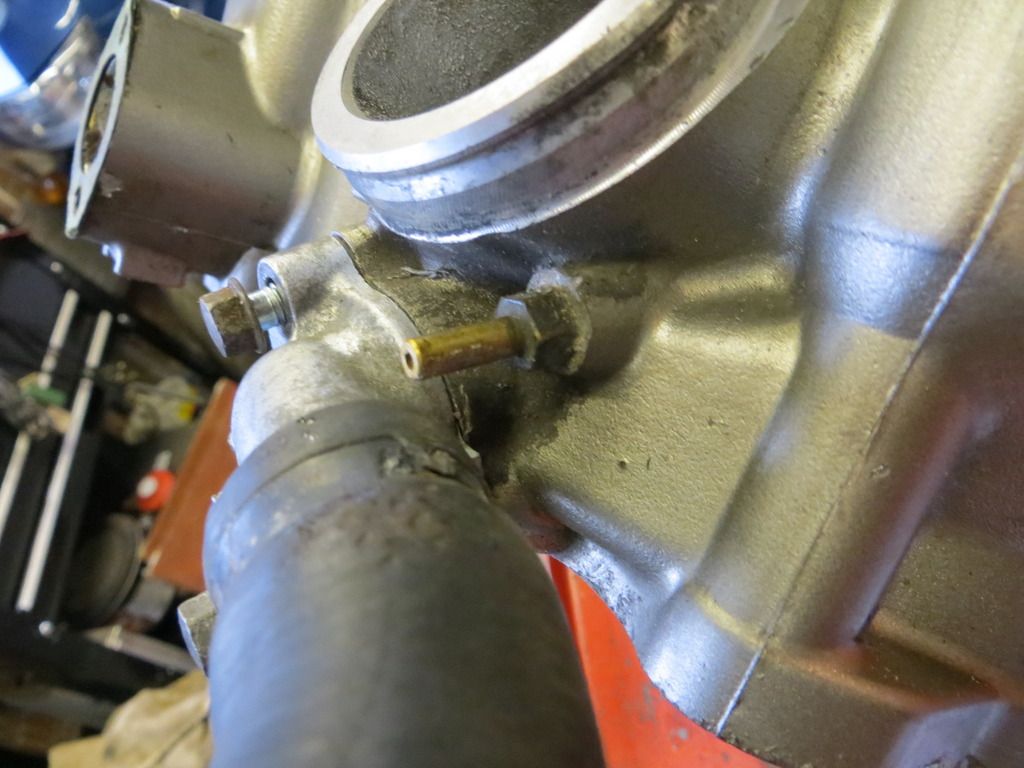
Anyway, crank timing mark in correct place :- the exhaust cam was absolutely spot on with the mark on the camshaft cog aligning perfectly with the edge of the head. However the inlet was out. Not sure if the picture shows that.
So next step was to measure the valve clearances - i only have one set of metric feeler gauges and they go in increments of 0.05. Exhaust clearances all fine.
The left exhaust valve clearance as you look from the front of the bike would take a 0.15, but not a 0.20 so it looks ok. However the right one(the one thats difficult to see because of the camshaft cap) easily took a 0.20, but not a 0.25. I perhaps should have gone and got some gauges with smaller increments but decided I should have a look inside anyway.
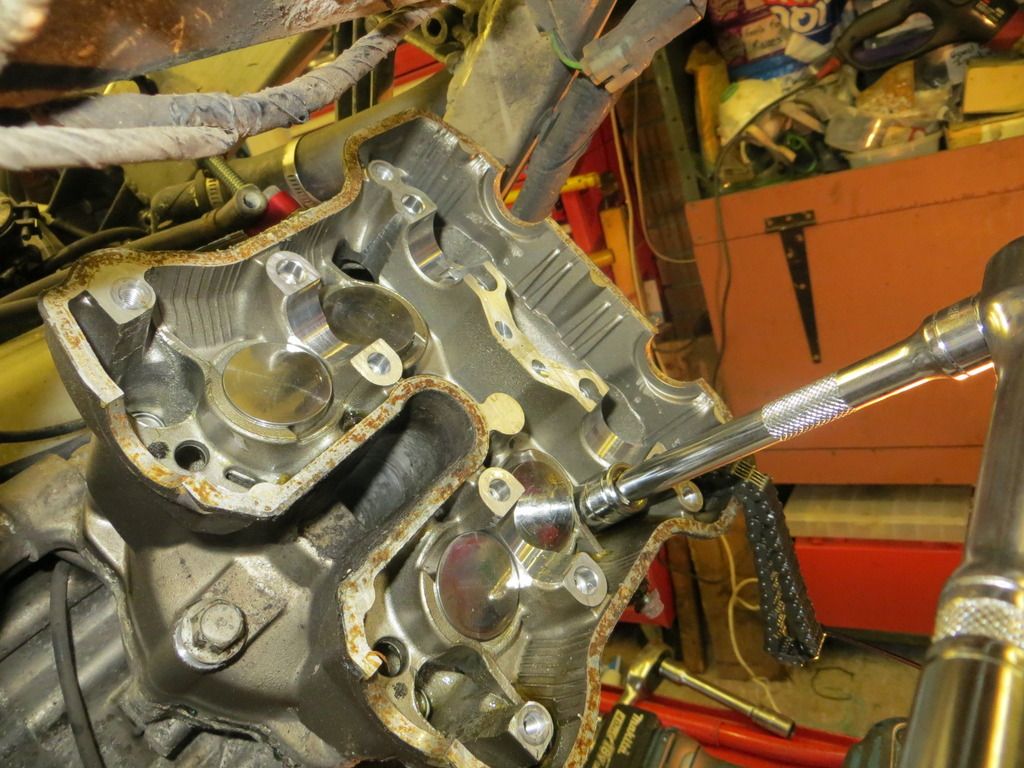
So it was off with the head!!!!
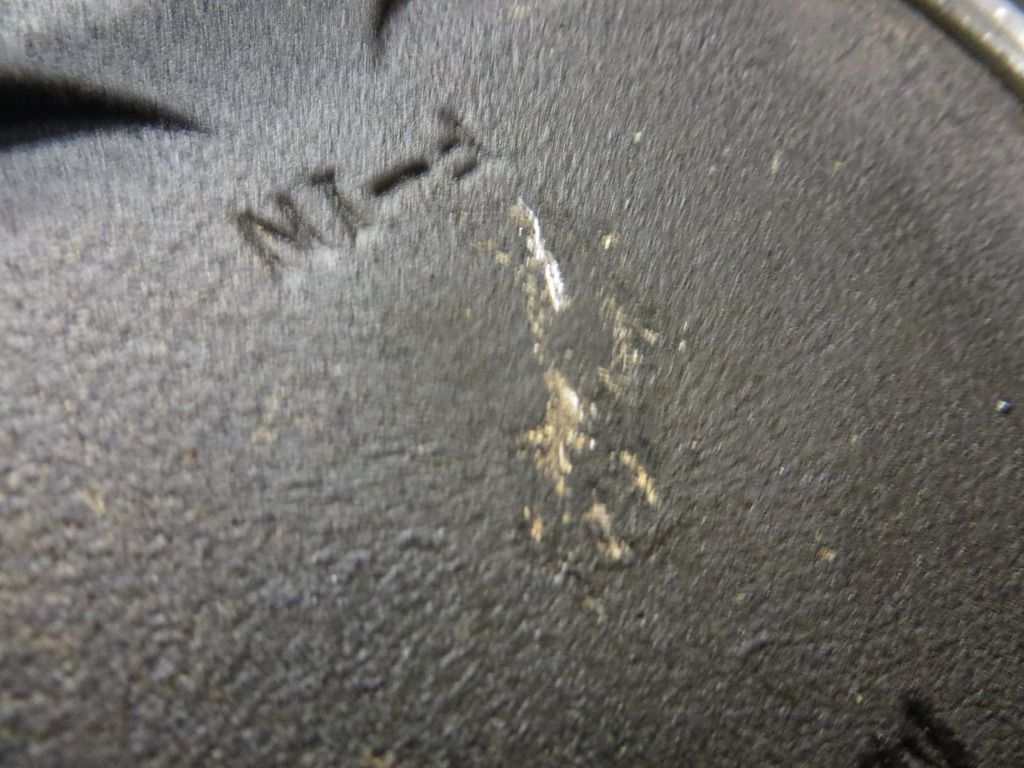
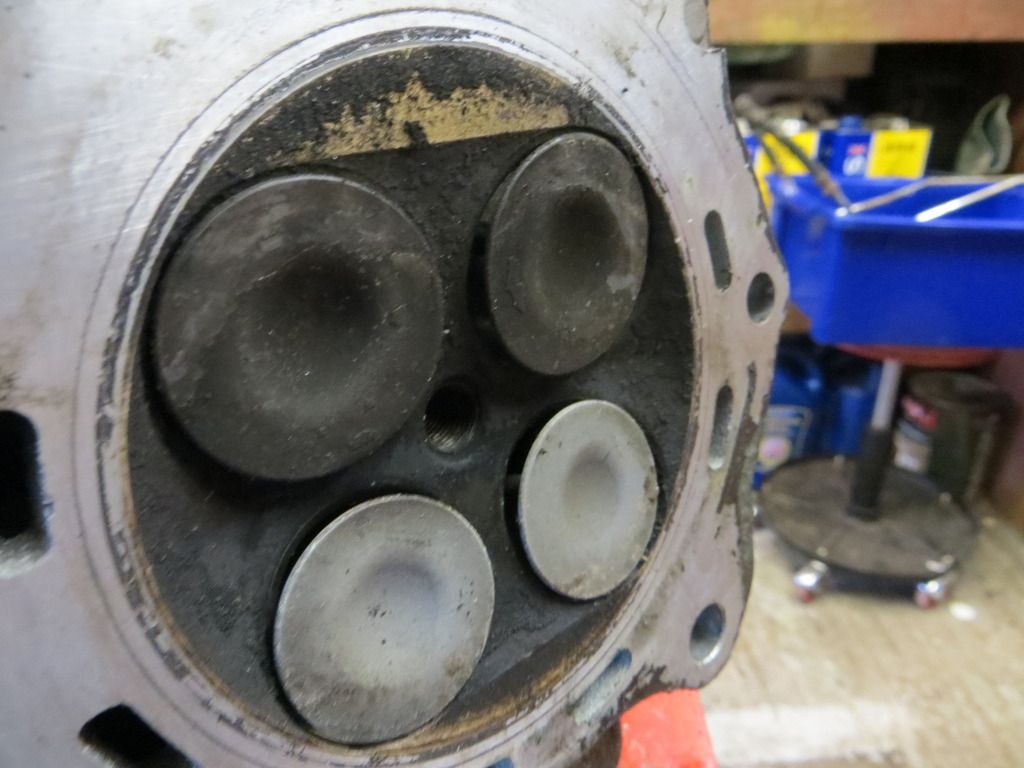
What I found was quite interesting in that there was a slight witness mark on the piston - aligned where the right valve would be. The valve appears to have no damage from just looking at it. I hope the picture is clear.
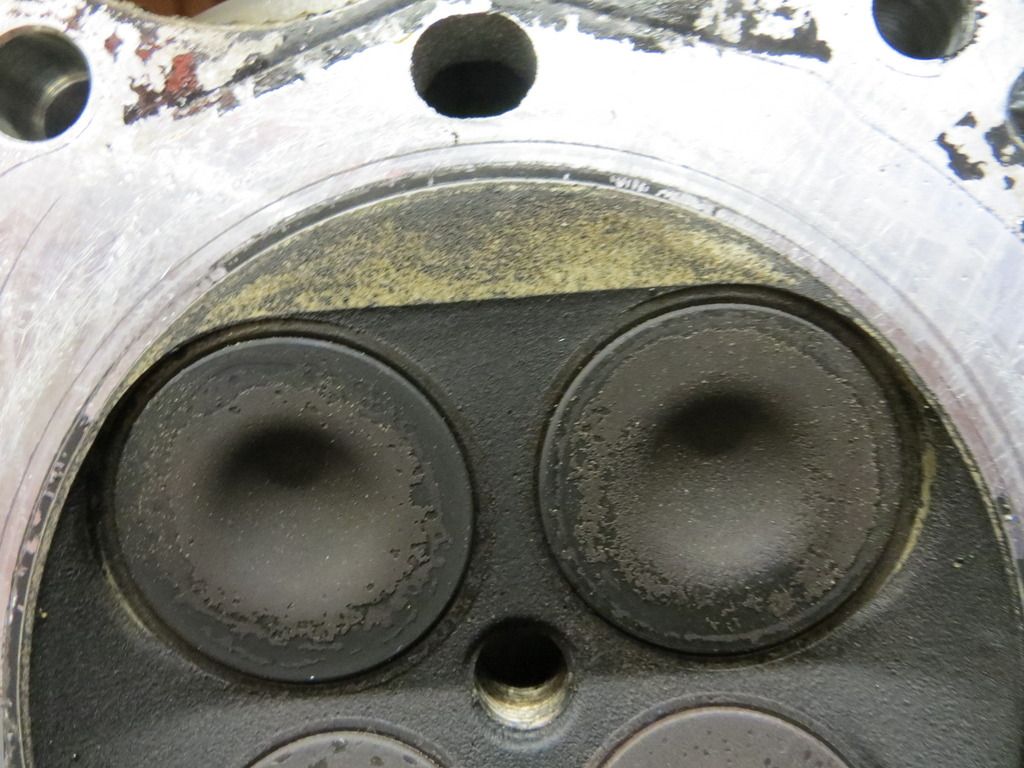
This is a picture of the inlet valves
So I guess I need advice on what to do next??? Is that increased valve clearance a sign of a bent valve or damaged stem?
I do have a spare front head that I'd forgotten I'd bought from Tony Mon ages ago.
Just wondering what this outlet on the Tony Mon head is for as I dont have one on my head
So I need some advice guys.
I've put the bike to bed today as Im working this evening and its a convenient place to stop and take stock.
Just as an aside I'd previously bought a pair of heads from ebay, I think with a view to having the rear one converting to a front. Just have a look at the valve problems on this front one !!!!
I hope all this stuff is proving interesting - Im loving it !!!
Brian
I managed to get a few hours in the garage today and decided it was full on for working out what is going on with that front cylinder.
Firstly however I checked the timing marks for the rear cylinder, as per the CCT guide and all is well, which is what I suspected.
Moving to the front cylinder it took me a while to work out properly how to be sure I was on TDC on the compression stroke - should have read the instructions as its very clear from them!!!!
Wherever I had the timing it was quite clear something was amiss - as suspected.
Anyway, crank timing mark in correct place :- the exhaust cam was absolutely spot on with the mark on the camshaft cog aligning perfectly with the edge of the head. However the inlet was out. Not sure if the picture shows that.

So next step was to measure the valve clearances - i only have one set of metric feeler gauges and they go in increments of 0.05. Exhaust clearances all fine.
The left exhaust valve clearance as you look from the front of the bike would take a 0.15, but not a 0.20 so it looks ok. However the right one(the one thats difficult to see because of the camshaft cap) easily took a 0.20, but not a 0.25. I perhaps should have gone and got some gauges with smaller increments but decided I should have a look inside anyway.
So it was off with the head!!!!

What I found was quite interesting in that there was a slight witness mark on the piston - aligned where the right valve would be. The valve appears to have no damage from just looking at it. I hope the picture is clear.

This is a picture of the inlet valves

So I guess I need advice on what to do next??? Is that increased valve clearance a sign of a bent valve or damaged stem?
I do have a spare front head that I'd forgotten I'd bought from Tony Mon ages ago.
Just wondering what this outlet on the Tony Mon head is for as I dont have one on my head

So I need some advice guys.
I've put the bike to bed today as Im working this evening and its a convenient place to stop and take stock.
Just as an aside I'd previously bought a pair of heads from ebay, I think with a view to having the rear one converting to a front. Just have a look at the valve problems on this front one !!!!

I hope all this stuff is proving interesting - Im loving it !!!
Brian