Bent valves.

Where all the workshop knowledge lives together.
tony.mon
Posts: 15965
Joined: Wed Jul 25, 2007 10:46 pm
Location: Norf Kent

Re: Bent valves.

Post by tony.mon »

Yorkie boy wrote:Well......it was all going smoothly. Link provided by Cybercarl made it all fairly straight forward and stripped everything down with no problems. However, when turning the crankshaft end bolt ahead of removing the ccts it feels like it's locked out. the first few turns were accompanied by a regular clicking noise and then nothing but a lot of resistance. Listening to Cybercarl's advice I haven't forced it but I'm stuck with how to sort the timing and get TDC.

Any suggestions on how best to proceed would be well received - kettle on, garage door shut (for now) !!

Stu
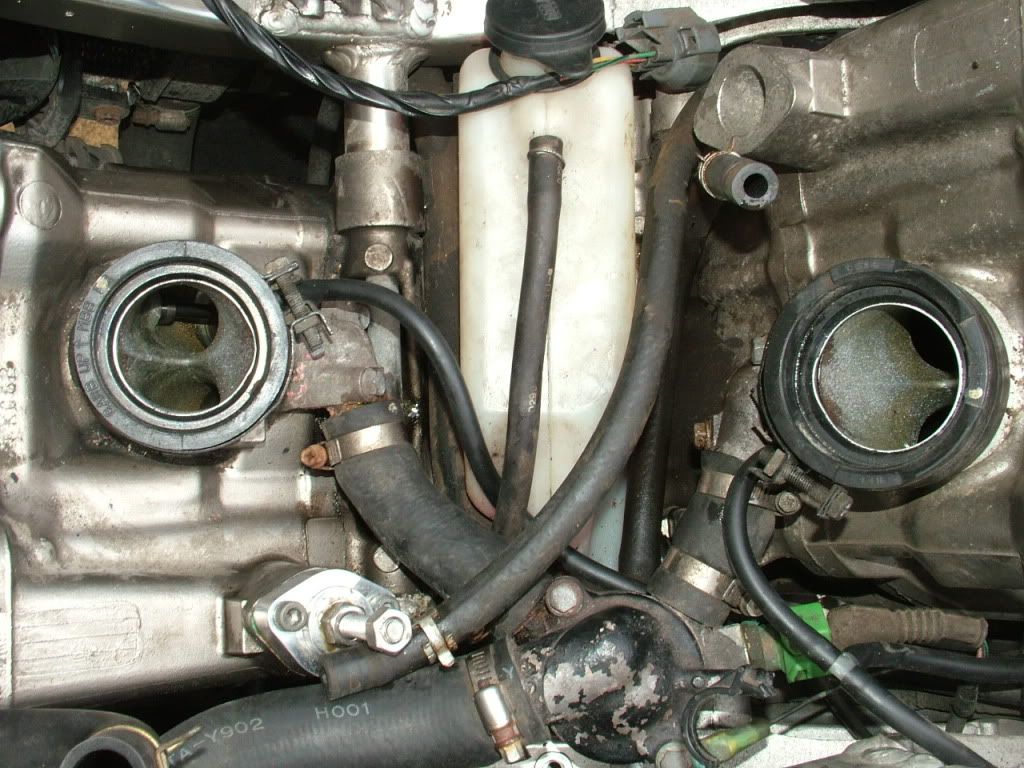
The regular clicking noise is the cams staying still and the chain clicking over the top of the teeth, instead of turning the sprockets.
This can only happen when a cct has failed.

It's not a disaster, don't turn the engine any more until the cams and cct are removed entirely on the affected head.
I'll most likely be the front cylinder.

Have a good read of Sirch's guide in the Workshop sticky section regarding how to fit manual cct's.
You will see that you can start the process with either cylinder in the correct top dead centre position.

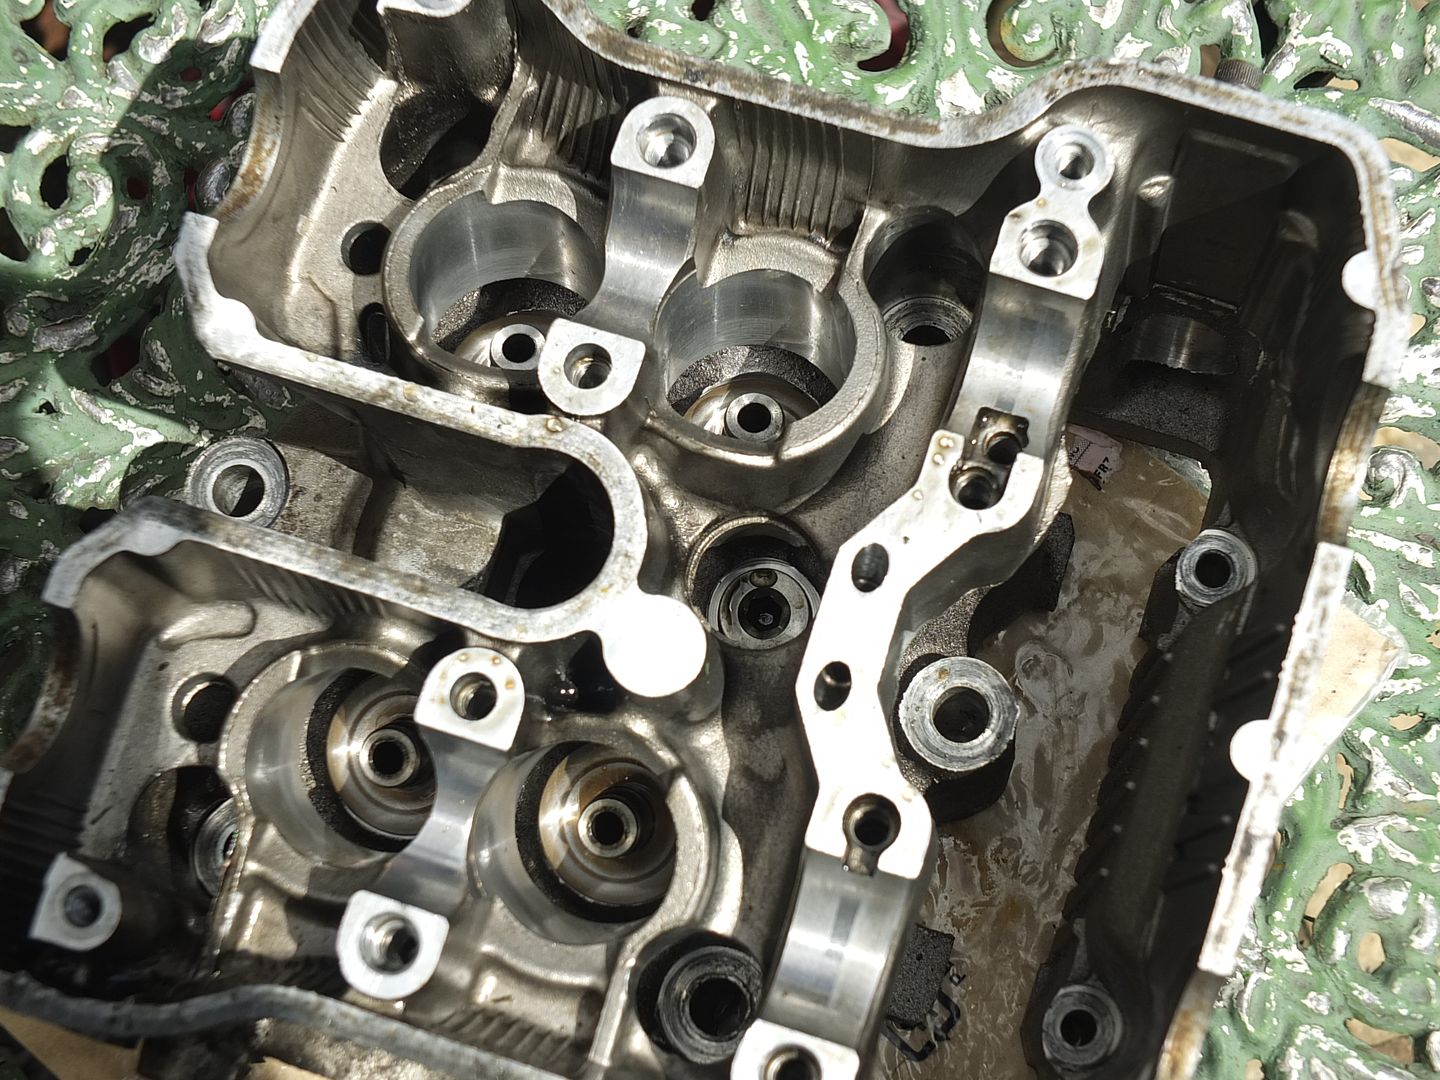
Assuming that I'm right and it';s the front one that's failed, once you have removed the front cams, and hooked the chain over a screwdriver sitting where one of the cams normally goes (to stop the chain snagging around the crankshaft when you turn it), you set the engine to the correct REAR tc (cams pointing upwards and towards each other). You won't have to remove the rear cams.
From that point, rotate the engine one and a quarter turns anticlockwise, and reinstall the front cams so that the lines on the sprockets line up with the top surface of the head, as near as it can be, anyway.

Don't forget to apply tension to the chain run on the tensioner side, even though it isn't there or working.
At this point you can choose to fit manual ccts, another set of standard Honda ones and take a chance when they fail again (not recommended) or fit a pair of new Honda ones and carry out the stopper modification to them.

Don't try to turn the engine over again without some sort of working CCT in it...

Once all that's done, you can then check valve clearances to see if you have bent any valves- normal clearances are in Haynes but anything over .5mm means that you have bent valves.
It's not falling off, it's an upgrade opportunity.
User avatar
Yorkie boy
Posts: 19
Joined: Wed Jul 23, 2014 10:39 am
Location: Bolton.

Re: Bent valves.

Post by Yorkie boy »

Cheers Tony, all was going well (the cam chain bolt did shear in one of the cam covers, but was extracted without too much drama!) But after removing the front cams, I only managed a few quarter turns on the crankshaft before it locked out again - the first few turns were a bit stiff but ok, and then a whole lot of resistance. Dreading the thought that I've bent the rear valves as well - any other reason why the crankshaft won't budge. Should I just be repeating the process on the front cylinder on the rear - remove the cams, line up TDC and reinstall????

Glorious late summer morning & hopes for being back on the road by September starting to disappear :(

Time for a brew!
tony.mon
Posts: 15965
Joined: Wed Jul 25, 2007 10:46 pm
Location: Norf Kent

Re: Bent valves.

Post by tony.mon »

Have you got the plugs out? There's a lots of resistance form compression.
But the most likely reason is that having removed the cams the cam chain is snagging round the crankshaft- make sure that the chain is pulled upwards (doesn't have to be taught or under tension) as you turn the crank.

If it's not that, take off the rear cam cover (might as well as you're this far in) and look at how far down the buckets (shiny drums under the cams) sit in the head casting, then compare to the front ones. If there is a noticeable difference, then the lower ones have bent valves.
It's not falling off, it's an upgrade opportunity.
User avatar
Yorkie boy
Posts: 19
Joined: Wed Jul 23, 2014 10:39 am
Location: Bolton.

Re: Bent valves.

Post by Yorkie boy »

Plugs are out but I was struggling to keep the cam chain up whilst reaching back. Will grab a spare pair hands and try to tease the crankshaft round. Glad you were online!

Brew finished, back to the garage :)
User avatar
VTRDark
Posts: 20010
Joined: Sun Mar 18, 2012 9:24 pm

Re: Bent valves.

Post by VTRDark »

As Tony is busy this weekend I shall reply. There is an extremely high chance that the rear cylinder is all OK as 9 times out of 10 it's the front CCT that fails, so don't panic. We'll forget about the rear for now and leave as is. One of two things is stopping you from being able turn a completely turn the crank. This would either be valves meeting the piston (cct failure) or the chain bunching up either at the crank or cams (cct failure) and if lucky not damaged any valves.

To verify if any valves are indeed damaged you need to be able to check the valve clearances (lash) with the front cylinder ideally on the compression stroke. Now I believe this is now what your attempting to do but not being able to get around onto the compression stroke as your meeting resistance.

What I suggest you do is temove the front CCT and loosen or remove both cam caps (4 bolts in each) on the front cylinder so there is no resistance on the valves ie they are all closed as there are no cam lobes pushing down on them and they wont move. Now... as long as the valves have no severe damage the piston has space to travel the complete stroke without meeting the valves. The only other thing that can stop you is the chain bunching up as it's slack so get a helping hand to pull the chain tight (both sides) up against and around the crankshaft and feed it around as you turn the crank over at the flywheel. Don't worry about the chain up top as the cams/valves have been taken out the equation for now. You should now be able to turn the crank all the way around without meeting any resistance as long as the valves are not severely damaged and in the way and the rear cylinder is all good.

Once you know you can turn the crank all the way around without resistance you can get yourself on the compression stroke. Start from the rear cylinder RT at the crank and both rear cam lobes pointing upwards and inwards. You can also check the alignment marks, RI and RE on the cam sprockets. A few mm off is OK they don't have to be spot on! Once you have the rear on the compression stroke, turn the crank anti-clockwise 1.1/4 turns (450 degrees) until you come around onto the FT at the crank. Note this is not the first time you see FT come around into view. It will pass once and it's the second time it comes around that is 1.1/4 turns. If you get lost or muddled, then go back to the compression stroke on the rear and start again.

Once your positive that your on the compression stroke then set the front cams back in place. in the position they should be in for the compression stroke as follows. You want to align the cams so the cam lobes are pointing upwards and outwards, yes up and out, the opposite to what the rear was, and with the FE and FI aligned up with the top of the cylinder head. To do this, start with the exhaust cam as this is the side where the chain should be pulled tight. The tensioner takes up the slack on the other side!! So keep the chain taught on the non tensioner side. Once the exhaust cam is lined up with the chain running over it, cable tie (zip tie) the chain around the sprocket and secure the cam down with the cam holder in place. Then move onto the inlet cam.

The front cylinder is now on the compression stroke and you can check for massively excess valve clearances. Ideally you should have a cam chain tensioner putting tension on the chain, but I highly suspect it's broke. TBH you have most likely bent some valves but lets see what your clearances are first. If valve/head damage has occurred it's no biggie. You could always pick up a used front cylinder head and transplant it on. Approx costs to do that job £150, you only need the complete head, replacement head gasket and some coolant. Oh and time to do the work. It probably sounds daunting to you but it's not so bad. Getting your head around the timing is worse. :thumbup:

(:-})
==============================Enter the Darkside
User avatar
VTRDark
Posts: 20010
Joined: Sun Mar 18, 2012 9:24 pm

Re: Bent valves.

Post by VTRDark »

Oh, O well he's not in the shed. :lol: I spent ages writing that as well.

Yorkie I suggest you read the following post in particular to tightening down the cam cap bolts. We don't want any others snapped do we. :wink:
http://www.vtr1000.org/phpBB3/viewtopic ... ps#p351307

(:-})
==============================Enter the Darkside
User avatar
Yorkie boy
Posts: 19
Joined: Wed Jul 23, 2014 10:39 am
Location: Bolton.

Re: Bent valves.

Post by Yorkie boy »

Thanks fellas but the lady's not for turning!

Front cams off, chain pulled up and taut, crankshaft rock solid - not a hint of movement. The front cct is out and there's no tension on the spring, so pretty convinced that it's gone.
The rear valve cover is off and the buckets are perhaps a couple of mil lower than those on the front but no more than that.
The rear cams are way off tdc, and with no movement on the crank - not sure where to go next and all brewed out!

Depressed of Lancashire :?
User avatar
VTRDark
Posts: 20010
Joined: Sun Mar 18, 2012 9:24 pm

Re: Bent valves.

Post by VTRDark »

:( :thumbdown:
crankshaft rock solid - not a hint of movement.
Is that in either direction. You should be able to move one way or the other. Sometime a link can get caught in the crank cogs so the chain needs a good tug when pulling taught.

It's looking more and more like there are damaged valves, the next stage would be to remove the front cylinder head and see what the damage is. The rear is not ruled out but it's highly unlikely that it has failed. You also seem to have confirmed the front cct has indeed failed so that's where the damage will be.

Have you downloaded the Honda workshop manual yet. If not do so, it's the one must have manual.
http://www.vtr1000.org/phpBB3/viewtopic ... 31&t=18025

If you want I can give detailed instructions on how to remove the cylinder head. Your more than halfway there already.

(:-})
==============================Enter the Darkside
User avatar
Yorkie boy
Posts: 19
Joined: Wed Jul 23, 2014 10:39 am
Location: Bolton.

Re: Bent valves.

Post by Yorkie boy »

Any help you can offer would be brilliant. I think I've got my head around the timing and advice on the forum gave me the confidence to tackle the ccts. I'll have another go with on the cam chain and give it a good yank - fingers crossed!

Thanks again all, its good to know your out there when I'm left scratching my head.

Now working on how to add images to my posts/avatar . . . . .
User avatar
VTRDark
Posts: 20010
Joined: Sun Mar 18, 2012 9:24 pm

Re: Bent valves.

Post by VTRDark »

Now working on how to add images to my posts/avatar . . . . .
See the Read Me for New Members in my signature.

As for removing the front cylinder head I presume your at the stage with everything stripped down as in the MCCT guide.
Image

Image

The worst part is having to undo the front exhaust header pipe nuts. Use plenty of lube/penetrative fluid on these and cross you fingers they come undone without snapping the stud. So get these undone first before commencing with anything else. Best to remove the exhaust system out the way completely but not totally necessary. It just makes access for removing the cylinder head simpler. Have a read up on exhaust removal/stud removal first!!!

Image

1) Drain the coolant. You may even want to consider removing both rads right out the way along with the hose that connects them both at the front.

2) Undo the small hose that connects from the thermostat housing to the front cylinder head.(see 1st pic above by front CCT).

3) Remove the camshafts along with the cam sprockets. Don't worry about the chain dropping down the cam tunnel. Leave the buckets and shims under the cams in place for now.

4) Looking down inside the tunnel you will see two bolts along the outside edge. Remove these being careful not to drop them down inside the tunnel. Consider stuffing rags down there just in case.

Image

5) Looking at the top of the cylinder head you will see 6 main cylinder head bolts. Two are really easy to see, one in the middle just inside from the last two bolts and one on the opposite outside edge near near the spark plug U shape. The other four are recessed around the outside near the cam buckets. Remove these in a criss cross pattern alternating from one to the other undoing a bit at a time. You will need a good socket set for this along with various length ratchet extensions.

That's it and the only thing holding the cylinder head in place now is where it has stuck to the gasket and also it sits on two metal dowels. Use a small flat edge to gently prise the cylinder head away from the block. You will notice some little cut out areas in the head for this purpose. The cylinder head should come out through the bottom of the bike with the steering turned onto full lock one way or the other. It may put up a little fight but will come off with a bit of persuasion.

Off the top of my head (no pun) that's about it. :thumbup:

(:-})
==============================Enter the Darkside
User avatar
Yorkie boy
Posts: 19
Joined: Wed Jul 23, 2014 10:39 am
Location: Bolton.

Re: Bent valves.

Post by Yorkie boy »

Thanks to Carl's guide the front head came off without too many dramas - and no sheared bolts! With a little help from a Harley cousin, we've had the valves out and the exhaust values didn't survive the cct failure - just waiting on replacements from David Silver, along with head & exhaust gaskets. In the meantime the front camchain was freed-up and I've been able to turn the crank and check the rear cct. Big relief, the cct was ok but has now been replaced with a manual one to avoid any repeat. Hopefully, the replacement valves will be here by the weekend and the head will go back on and the clearances checked - appreciate Thunderbolt's write-up and photos. Been off the road far too long, but fingers crossed the sun will keep shining.

Quick question, am I best off using gasket sealant with the new head gasket or are the Honda gasket's reliable?

Thanks all for the help so far, been a bit of a journey for a novice on the spanners :thumbup:
User avatar
VTRDark
Posts: 20010
Joined: Sun Mar 18, 2012 9:24 pm

Re: Bent valves.

Post by VTRDark »

Well done :clap: two valves, that sounds about right :(

Don't use any sealant with the new head gasket, it goes straight on as it is. You do need to prepare the surfaces to get rid of any old gasket residue and smooth out any imperfections first.

To do the block I fill the cylinder with rags to try and prevent any crud falling down there. Then I use a large flat surface like a bit of timber or metal plate. It does need to be perfectly smooth though! I then wrap a complete sheet of wet n dry (silicone carbide) paper around it and rub the surface down in nice long even coats backwards and forwards in all directions. Use it wet... a bit of soapy water works well and don't skimp on using it. Or you can even use WD40, I've used that before and it works very well. A lot less messy than soap and water too. Squirt a bit on the surface and on the paper.

You don't have to put too much pressure on it or take loads of the surface off. Just enough to clean any old gasket material and carbon/heat stains. If there is thick gasket material on there then you can start with Stanley blade to scrape it off. Then move onto the wet N dry,

You will now when it's done as you will be left with a nice clean shiny surface. Then move onto the underside of the cylinder head. Obviously this is off the bike so is easier to do. I usually start off with some 240 grit then move onto 320 and then onto 600grade wet n dry. You will need at least one sheet of each for each surface, so two of each grades that is.

Make sure everything is clean and all the crud is washed/wiped away. Pull the rags out the cylinder and remove any crud that has fallen inside. I also give the cylinder wall a this smear of engine oil. If you feel the need to, while you have the head off and wet n dry on the go. You can give the top of the piston/crown, bowl area of the cylinder head/valve faces a de-coke/get rid of any excess carbon build up.

The new valves should be lightly lapped into the seats too with some valve grinding paste.

For example
http://www.ebay.co.uk/itm/CHEMICO-VALVE ... 3f34398a02

Have a google on lapping valves :thumbup:

Have you got any pics. Lets see the piston and the cylinder head bowl area/valves. :wink:

(:-})
==============================Enter the Darkside
tony.mon
Posts: 15965
Joined: Wed Jul 25, 2007 10:46 pm
Location: Norf Kent

Re: Bent valves.

Post by tony.mon »

Halfords do paste and stick for less than £4.

I just scrape off the old gasket residue and reassemble- never had one leak.

They're too small and square to distort- unlike an il4 head.
It's not falling off, it's an upgrade opportunity.
User avatar
Yorkie boy
Posts: 19
Joined: Wed Jul 23, 2014 10:39 am
Location: Bolton.

Re: Bent valves.

Post by Yorkie boy »

On the de-coke, I've read loads but found no real agreement on what's best - so far chemicals seem to either destroy the engine block or give you lung disease. Anyone used something a bit friendly to man and machine?
User avatar
VTRDark
Posts: 20010
Joined: Sun Mar 18, 2012 9:24 pm

Re: Bent valves.

Post by VTRDark »

I wouldn't worry about it too much unless it's real bad thick with carbon build-up. I wouldn't use any chemical type products as you don't want to damage the rubber in the stem seals if any goes down the guides. A blade to scrape with and wet n dry is all you need.

(:-})
==============================Enter the Darkside
Post Reply